How to Speed Up Windows 11 in 2026
Windows 11 is not slow. But a typical Windows installation that has been running for a year or two — with startup programs accumulating, storage filling up, and default settings that prioritise visual polish over responsiveness — often feels that way. The good news is that most of the causes are fixable without reinstalling anything or buying new hardware.
This guide works through every meaningful optimisation in priority order: the things that make the biggest real-world difference first, the marginal gains last. Not everything here will apply to your machine — skip anything that does not fit your setup.
Step 0: Find out what is actually slow
Before changing anything, open Task Manager (Ctrl+Shift+Esc) and watch the Performance tab for 60 seconds during normal use. Which resource hits 80 to 100 percent consistently — CPU, RAM, disk, or GPU? That column tells you where to focus. Fixing a disk bottleneck when the real problem is 6 GB of RAM will not help much.
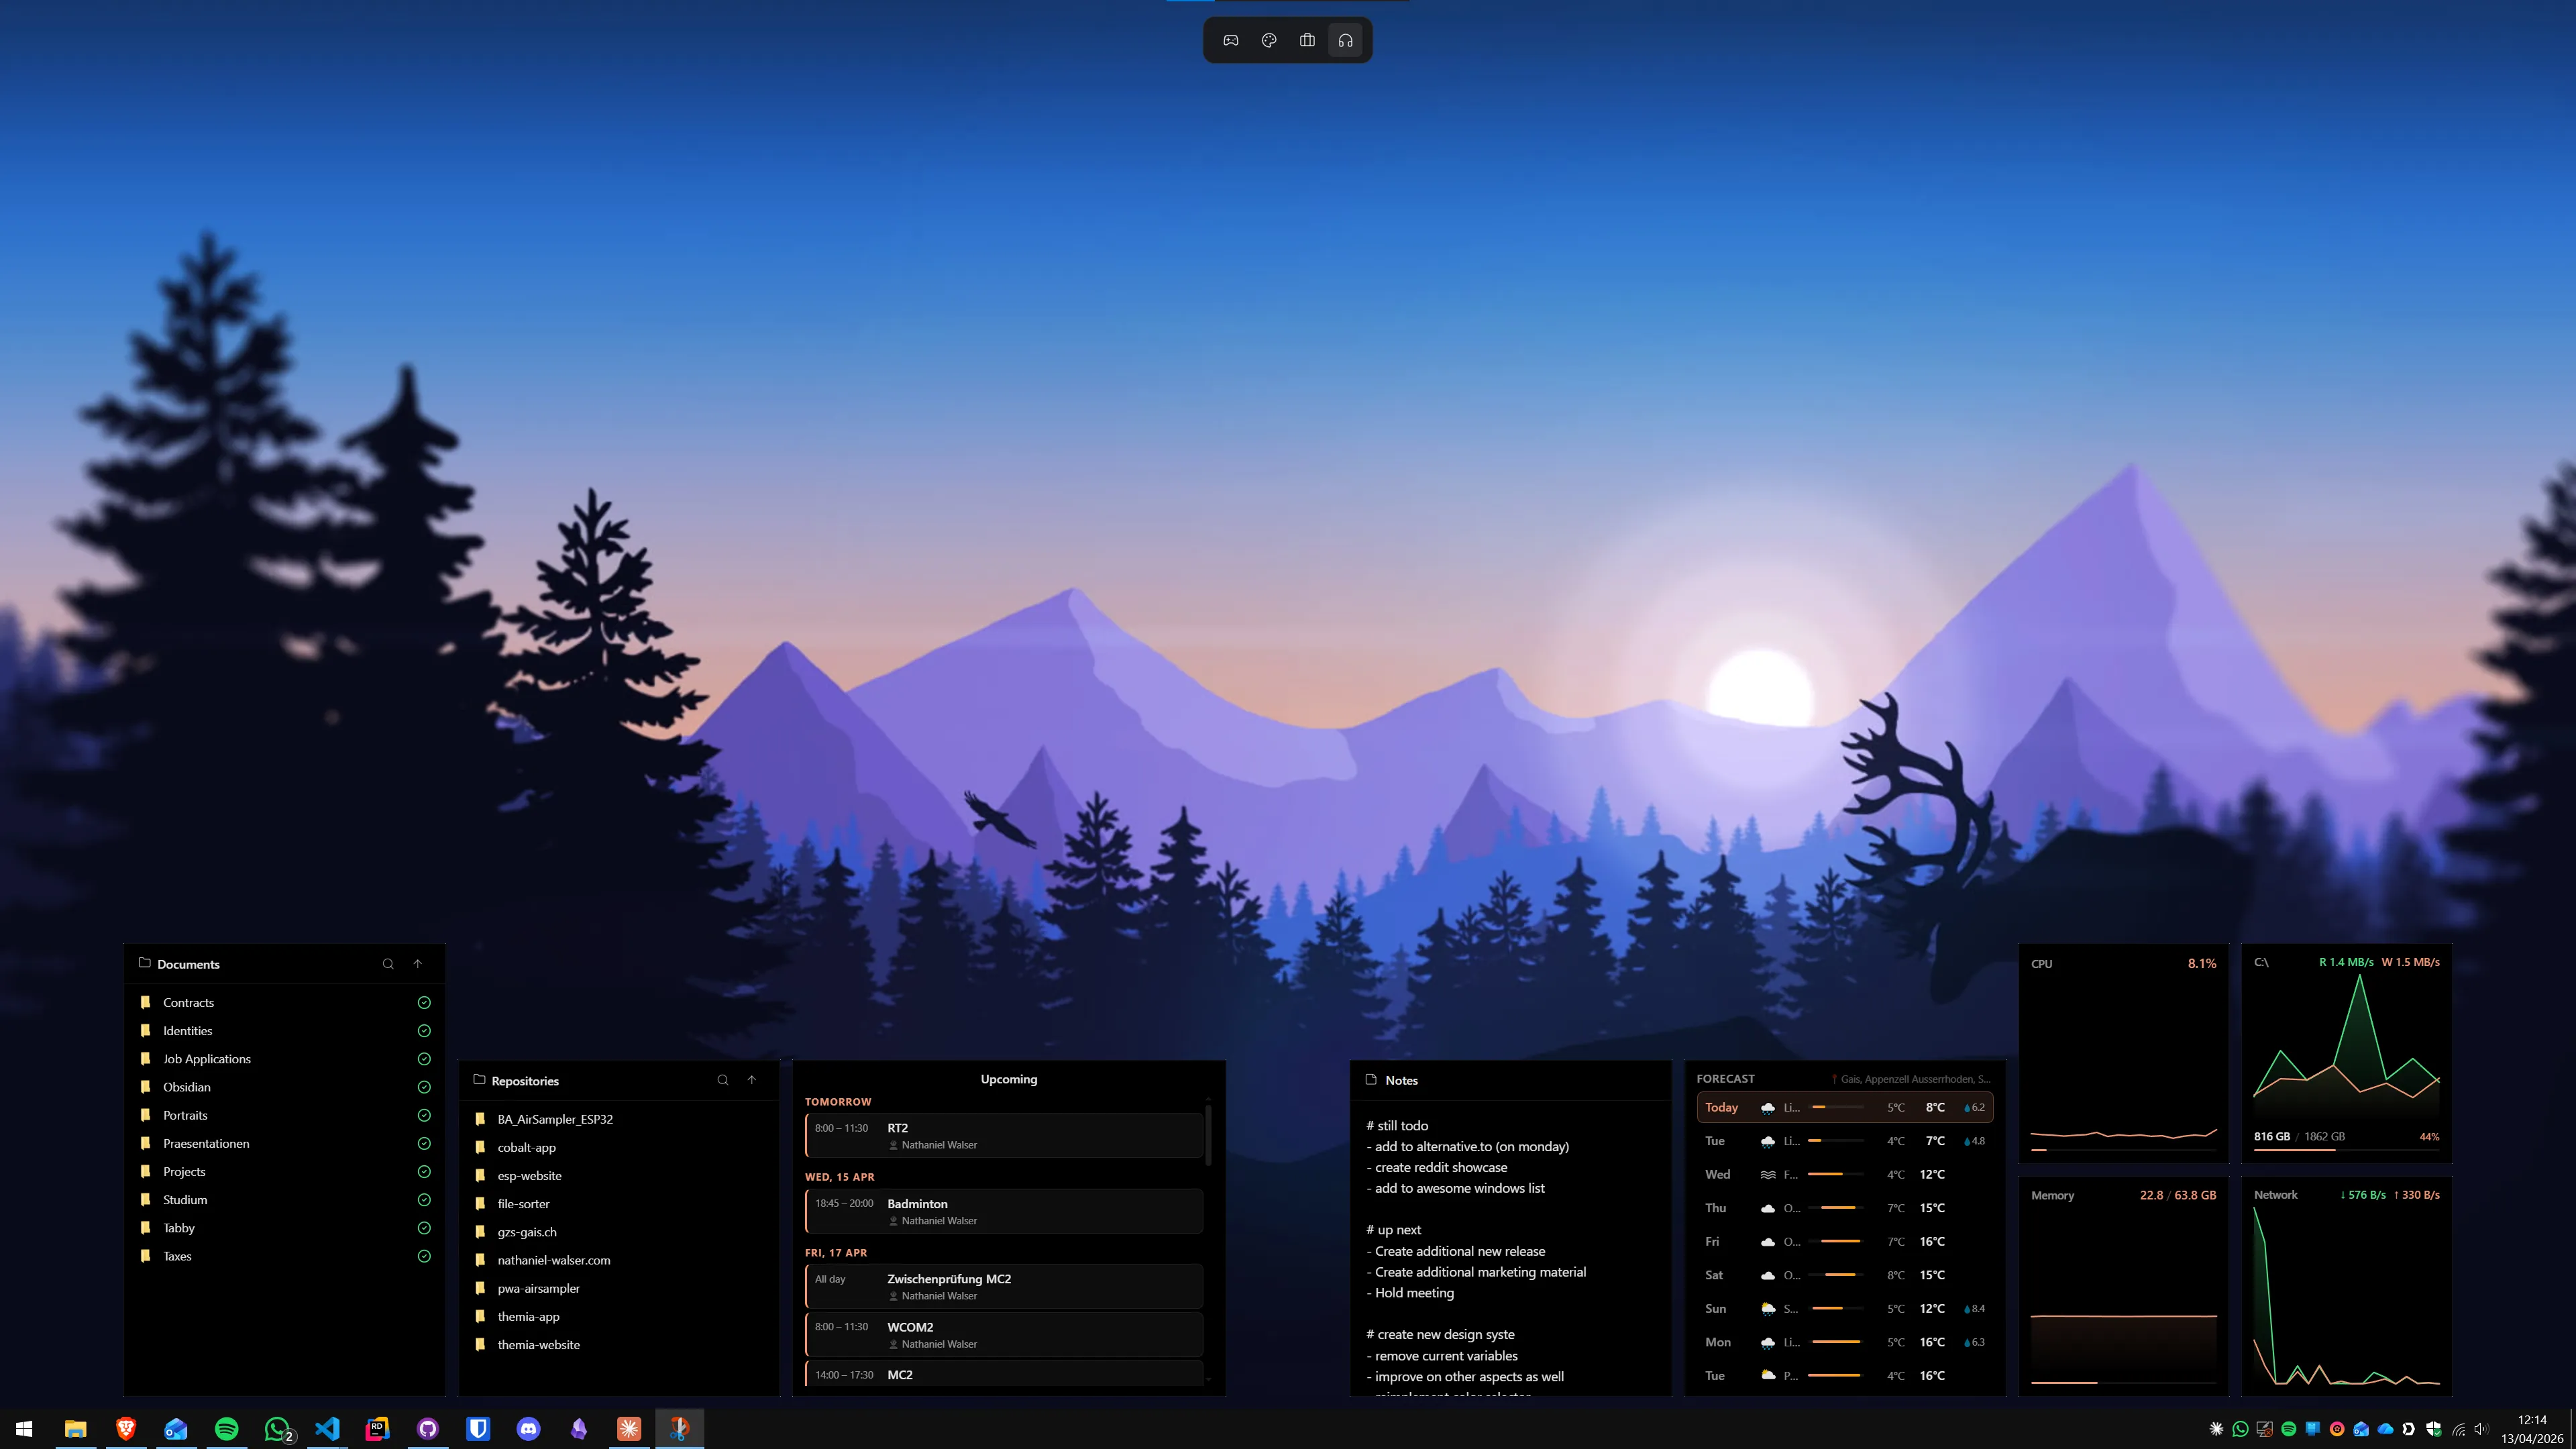
If you want these numbers always on screen without opening Task Manager, a system stats widget on your desktop does this passively. The approach is covered in our guide to building a productivity dashboard on Windows.
1. Cut your startup programs down
This is the single highest-return action for most people. Every program that starts with Windows adds to boot time and keeps consuming RAM and CPU until you close it. Many programs add themselves to startup without ever asking.
- Open Task Manager → Startup apps tab (or search "Startup apps" in Settings).
- Sort by Status so Enabled items are visible, then by Startup impact.
- Right-click each High-impact program you do not need immediately at login and choose Disable.
- Restart and notice the difference.
Safe to disable for most people: Spotify, Discord, Teams (if you launch it manually), software updater daemons for apps like Adobe and Zoom, manufacturer companion apps (HP Support Assistant, Lenovo Vantage if you do not use them). Keep: your security software, one cloud sync client, your GPU control panel if it has active features you use.
2. Switch to a power plan that matches your hardware
Windows ships with a Balanced power plan that throttles the CPU to save energy. On a desktop plugged into the wall, Balanced is a compromise you do not need to make.
- Open Settings → System → Power.
- Under Power mode, select Best performance.
If that option is not visible, or you want the more aggressive Ultimate Performance plan (which eliminates most power-saving pauses entirely), open an admin Command Prompt and run:
powercfg -duplicatescheme e9a42b02-d5df-448d-aa00-03f14749eb61
Then go to Control Panel → Power Options → and select Ultimate Performance from the list. On a laptop, revert to Balanced when on battery — Ultimate Performance runs hot and drains charge quickly.
3. Trim visual effects
Windows 11 defaults to animations and transparency throughout the interface. On modern hardware this costs little. On anything older than about 2018 it adds up.
- Press Win+R, type sysdm.cpl, press Enter.
- Open the Advanced tab → Performance → Settings.
- Choose Adjust for best performance to disable everything, or Custom to pick what to keep. A reasonable middle ground: uncheck animations, keep "Smooth edges of screen fonts" and "Show thumbnails instead of icons".
Separately, go to Settings → Personalization → Colors and toggle Transparency effects off. And in Settings → Accessibility → Visual effects, turn off Animation effects. These two are the easiest wins without touching the sysdm.cpl dialog.

4. Enable Storage Sense and clear the junk
A nearly full system drive slows Windows down — especially if the drive is an HDD or a budget SSD with slower write speeds. Windows needs space for temporary files, virtual memory, and update staging.
- Go to Settings → System → Storage.
- Turn on Storage Sense and click it to configure the schedule. Set it to run every month, delete temporary files, and empty the Recycle Bin after 30 days.
- Scroll down to Cleanup recommendations for a one-time scan of large and unused files.
For a manual one-time cleanup: press Win+R, type cleanmgr, run it as administrator, and check every box including Windows Update Cleanup — this alone can reclaim several gigabytes of old update files on long-running installations.
5. Update — or roll back — your drivers
Outdated GPU drivers are the most common cause of inexplicable slowdowns in GPU-heavy tasks, from video playback to scrolling in a browser. Update them through the manufacturer's tool, not through Windows Update:
- Nvidia: GeForce Experience or the Nvidia driver download page.
- AMD: AMD Software: Adrenalin Edition (ships with the driver, updates within the app).
- Intel Arc: Intel Arc Control or the Intel Driver & Support Assistant.
Conversely, if a machine got slow immediately after a driver update, the new driver may be the problem. Roll back via Device Manager → display adapter → Properties → Driver tab → Roll Back Driver.
6. Enable Hardware Accelerated GPU Scheduling (HAGS)
HAGS moves GPU command scheduling off the CPU into the GPU's own scheduler hardware. It reduces frame-time latency in games and GPU-heavy applications. It is off by default on some hardware configurations.
- Go to Settings → System → Display → Graphics → Default graphics settings.
- Toggle Hardware-accelerated GPU scheduling on.
- Restart for the change to take effect.
Requires: a dedicated GPU that is Nvidia GTX 1000-series or newer, AMD RX 5000-series or newer, or Intel Arc — with an up-to-date driver. Integrated graphics do not support HAGS.
7. Manage your virtual memory settings
Windows manages the page file automatically by default, which is usually correct. If you see consistent high RAM usage in Task Manager (90 percent or more) and performance is degrading, increasing the page file can prevent the worst slowdowns while you address the root cause (usually not enough RAM for your workflow).
- Open sysdm.cpl → Advanced → Performance Settings → Advanced → Virtual memory → Change.
- Uncheck "Automatically manage paging file size for all drives".
- Select your system drive, choose Custom size, and set Initial size and Maximum size each to 1.5× your installed RAM in MB (e.g. 24576 MB for 16 GB RAM).
- Click Set, OK, restart.
If you have 32 GB or more RAM and rarely see it fully consumed, the automatic setting is fine.
8. Check for malware before anything else
A machine that suddenly got slow without any other obvious change should be scanned before optimisation. Malware, cryptominer code, and browser hijackers all cause sustained CPU and disk spikes that look identical to "Windows being slow" in Task Manager at a glance.
Run a full scan with Windows Security (built-in, free) and then a second pass with Malwarebytes Free (different engine, catches things Windows Security misses). If both come back clean, proceed with the performance steps above.
9. Optimise your disk — but only if it is an HDD
If your system drive is a spinning hard disk, defragmentation helps. Windows schedules this automatically. You can run it manually via the Defragment and Optimize Drives tool (search in Start).
Do not defragment an SSD. SSDs do not benefit from defragmentation and the extra write cycles reduce the drive's lifespan. The Optimize Drives tool handles this correctly — it sends a TRIM command to SSDs rather than defragmenting them, which is what you want.
10. What not to bother with
A few popular tips that do not actually help much:
- Disabling Windows Search indexing: indexing runs at low priority and pauses when you are actively working. Disabling it makes file and app searches dramatically slower for no perceptible responsiveness gain.
- Registry cleaners: third-party registry cleaning tools have no measurable effect on Windows performance and occasionally cause problems by removing entries that legitimate software still needs. Skip them entirely.
- "RAM cleaner" apps: flushing RAM into the standby list does not free usable memory — it just makes Windows re-read things it already had cached, causing a brief spike in disk activity before performance returns to the same level.
- Disabling Windows Update: update slowdowns are temporary and running on an unpatched system is a poor trade for marginal speed gains.
How to keep it fast long-term
The two things that degrade Windows performance most over time are startup program accumulation and storage filling up. Set a calendar reminder to check both every six months:
- Open Task Manager Startup tab and disable anything new that has appeared with High or Medium impact.
- Check that Storage Sense ran recently and that your system drive has at least 15 to 20 percent free space.
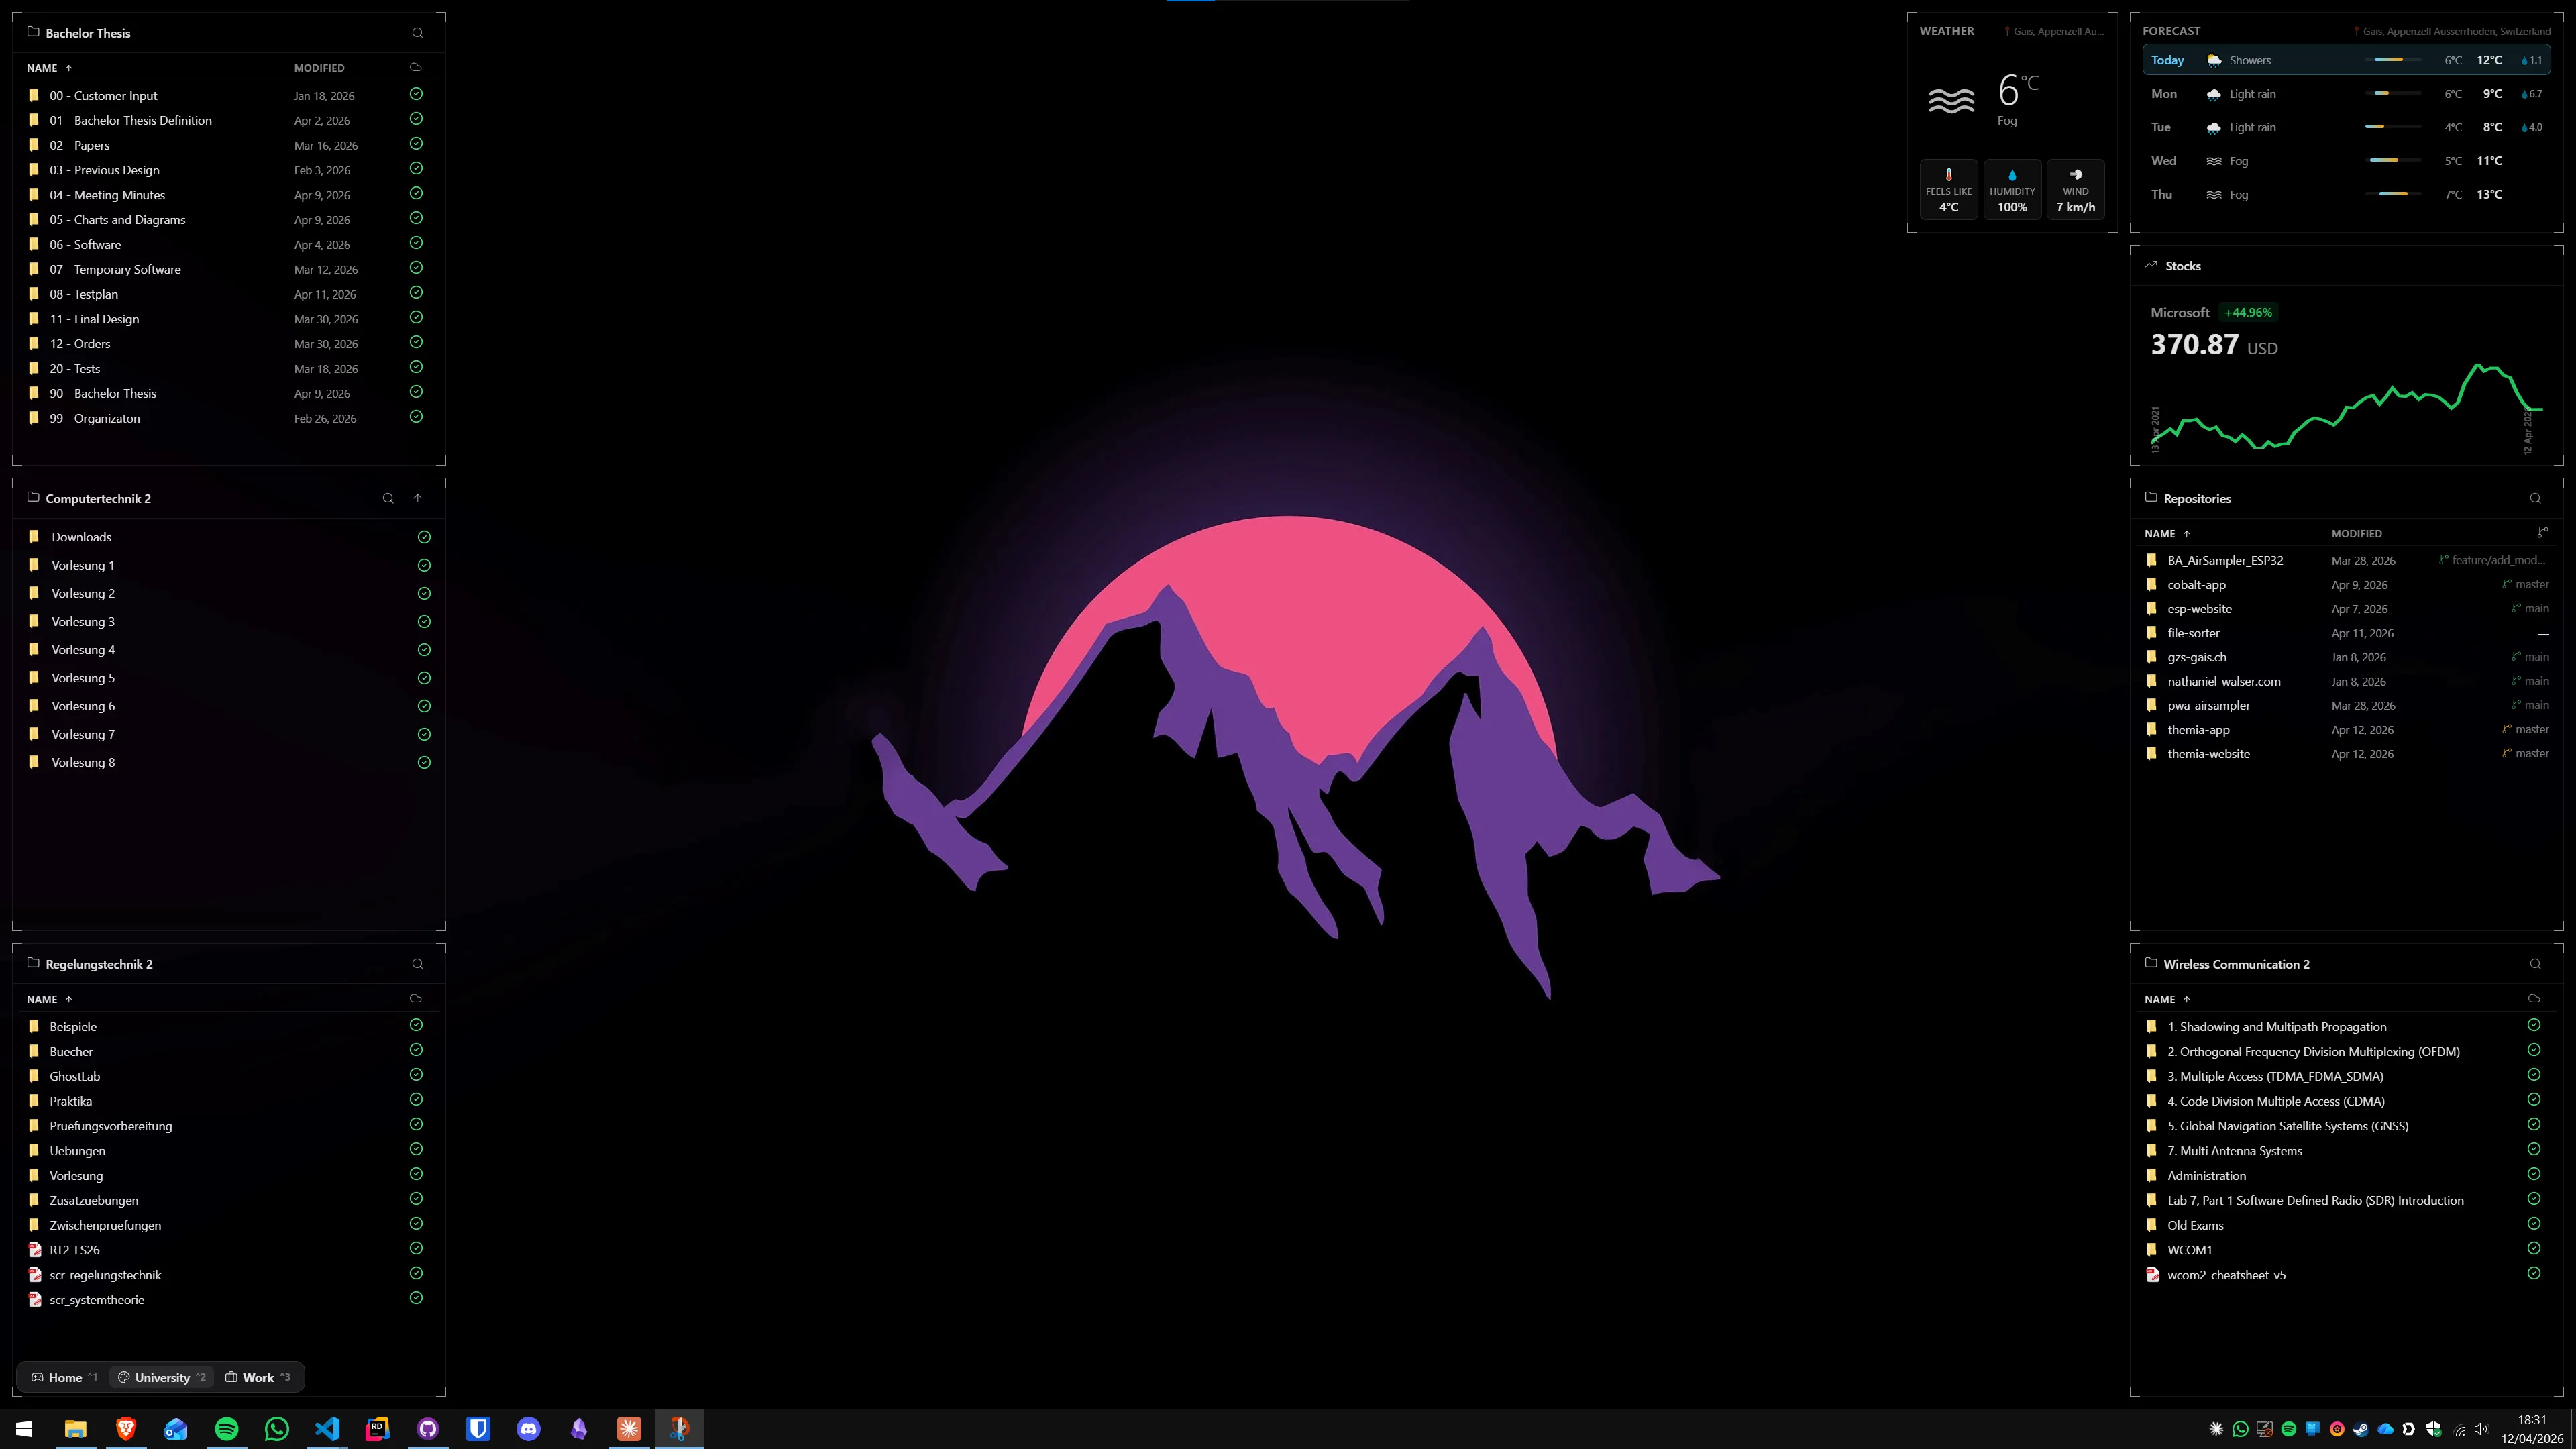
For a properly configured working environment — one where your apps, widgets, and layouts are deliberately organised — the setup guide for Windows 11 for working from home covers the broader workflow picture. A fast machine that is also thoughtfully set up is genuinely nicer to spend a day in.
FAQ
Does turning off visual effects actually make a noticeable difference?
On recent hardware with an SSD, the difference is subtle. On older machines — pre-2018 CPUs, 8 GB or less RAM, a spinning HDD as the system drive — disabling animations can meaningfully cut app-launch and startup times. The most impactful single option in the Performance Options dialog is "Animate windows when minimizing and maximizing". Uncheck that first and see how the machine feels before unchecking everything.
Should I disable SysMain (Superfetch) on an SSD?
On a modern NVMe or SATA SSD, SysMain makes little practical difference either way because SSDs are fast enough that pre-loading apps into RAM saves only milliseconds. If Task Manager shows SysMain causing sustained high disk activity after startup, disabling it via services.msc is reasonable. On a spinning HDD, keep it on — pre-loading genuinely matters when random-read speeds are slow.
What is the Ultimate Performance power plan and should I use it?
Ultimate Performance is a hidden Windows power scheme that eliminates most CPU and disk power-saving pauses, keeping hardware at peak clocks more aggressively than the standard High Performance plan. To activate it, open an admin Command Prompt and run: powercfg -duplicatescheme e9a42b02-d5df-448d-aa00-03f14749eb61. It then appears in your power plan list. On a plugged-in desktop doing CPU-bound work it can improve responsiveness. On a laptop it burns noticeably more battery — use it only when plugged in.
How many startup programs is too many?
There is no hard number, but the ones that matter are those marked High startup impact in the Task Manager Startup tab. Anything marked Low has negligible effect. High-impact items — video call apps that auto-launch, software updaters, unnecessary cloud clients — are the ones worth disabling. Keep your security software, one cloud sync client, and anything your workflow actually needs. Disable the rest and restart. Almost nothing important will break.
Does Hardware Accelerated GPU Scheduling (HAGS) help with everyday tasks?
HAGS moves GPU scheduling off the CPU onto a dedicated hardware scheduler, reducing frame-time latency. For gaming and GPU-heavy apps like video editing it can help. For office work and browsing, the impact is invisible. It is safe to enable on any Nvidia GTX 1000-series or newer, or AMD RX 5000-series or newer GPU with an up-to-date driver. The setting lives under Settings → System → Display → Graphics → Default graphics settings.
Is it safe to delete files from the Temp folder?
Yes. Press Win+R, type %temp%, and delete everything in the folder that opens. Files currently locked by a running application will be skipped automatically, which is harmless. The folder refills over time — that is normal. Enabling Storage Sense in Settings → System → Storage handles this automatically on a schedule so you never have to think about it again.